
Can you have dynamic eyes that react to the environment but at the same time use frame-by-frame animation for the body? Yes, you can do that in Unity and it’s not difficult at all.
Most of the work is setting up the hierarchy of GameObjects in Unity correctly and creating the animations. The frame-by-frame animation in my example comes from Unity’s ‘2D Roguelike’ tutorial. I added wiggle eyes for demonstration purposes. The tutorial is divided into incremental steps to illustrate the learning process of setting up the animation.
Step 0 – Create and Move the Player

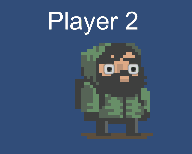
 Visual demo and setup of the gameObjects
In this setup all necessary GameObjects are already created. The body with the frame-by-frame animation and the two eyes as separate objects. If you don’t know how to set up an animation in Unity you can find a lot of tutorials on the internet. (I won’t go into details here)
With this setup you will quickly notice that the eyes do not move. Only the character moves across the screen. This is because only the body moves. If you want the eyes to move, you have to parent them under the body.
Step 1 – Parent the Eyes

 Visual demo and setup of the gameObjects
This setup is much better than the previous one. The eyes now move with the character when he moves. But wait, they don’t move up/down with the animation. If the character had a rig, the eyes would automatically move with the body. But we don’t have a rig because we use a sprite animation. This means that we have to manually move the eyes with the animation.
Step 2 – Animate Eyes
 Visual demo and setup of the gameObjects
Open your sprite animation in the animation window and add keyframes for the eyes. To do this, add the Transform.Position properties of the eyes to the animation. Adjust the keyframes until you are happy with the up/down movement of the eyes. Now all parts of the character’s body move in sync.

Animation with the position of the eyes added.
Step 3 – Move Pupils


Left: demo with eye movement. Right: comparison of all previous steps.
Now for the topic of this blog entry: moving the pupils. A simple way to move the pupils is to parent a pupil object under each eye and move it in code. The script below moves the pupil a set distance from the center of the eye in the direction of an object. In our case the object of interest is the yellow ball. The script must be placed on the eye gameObject not the pupil to work correctly.
// Author: Anja Haumann

using UnityEngine;

public class EyeMover : MonoBehaviour
{
    [Tooltip("Pupil that will be moved in the direction of the target")]
    [SerializeField]
    private Transform pupil;

    [Tooltip("Object the eye is looking at")]
    [SerializeField]
    private Transform lookAtTarget;

    [Tooltip("The distance the pupil is alowed to travel from the center of the eye.")]
    [SerializeField]
    private float movementDistance = 0.1f;

    void Update()
    {
        Vector3 direction = lookAtTarget.position - transform.position;
        Vector3 offset = direction.normalized * movementDistance;
        pupil.transform.localPosition = offset;
    }
}
This is one of the most basic ways to implement a Look-At. From here you can dive further into the topic and add more complex code. For example, interest zones that change the target of the eyes as soon as the player walks into them. Or different layers of eye behaviour that switch between random eye movement and object focus based on distance.
If you take this to the extreme, you’ll end up with the Witcher 3 eye-system. So before you dive deep into the matter, you should consider if it has to be that complicated. Most of the time a simple look-at that is blended with an eye idle animation is enough. We have implemented something similar in Space Shop VR.
If you want to play around with the implementation yourself, here is my example project. Just download it and try it out: LookAtAnimationTest